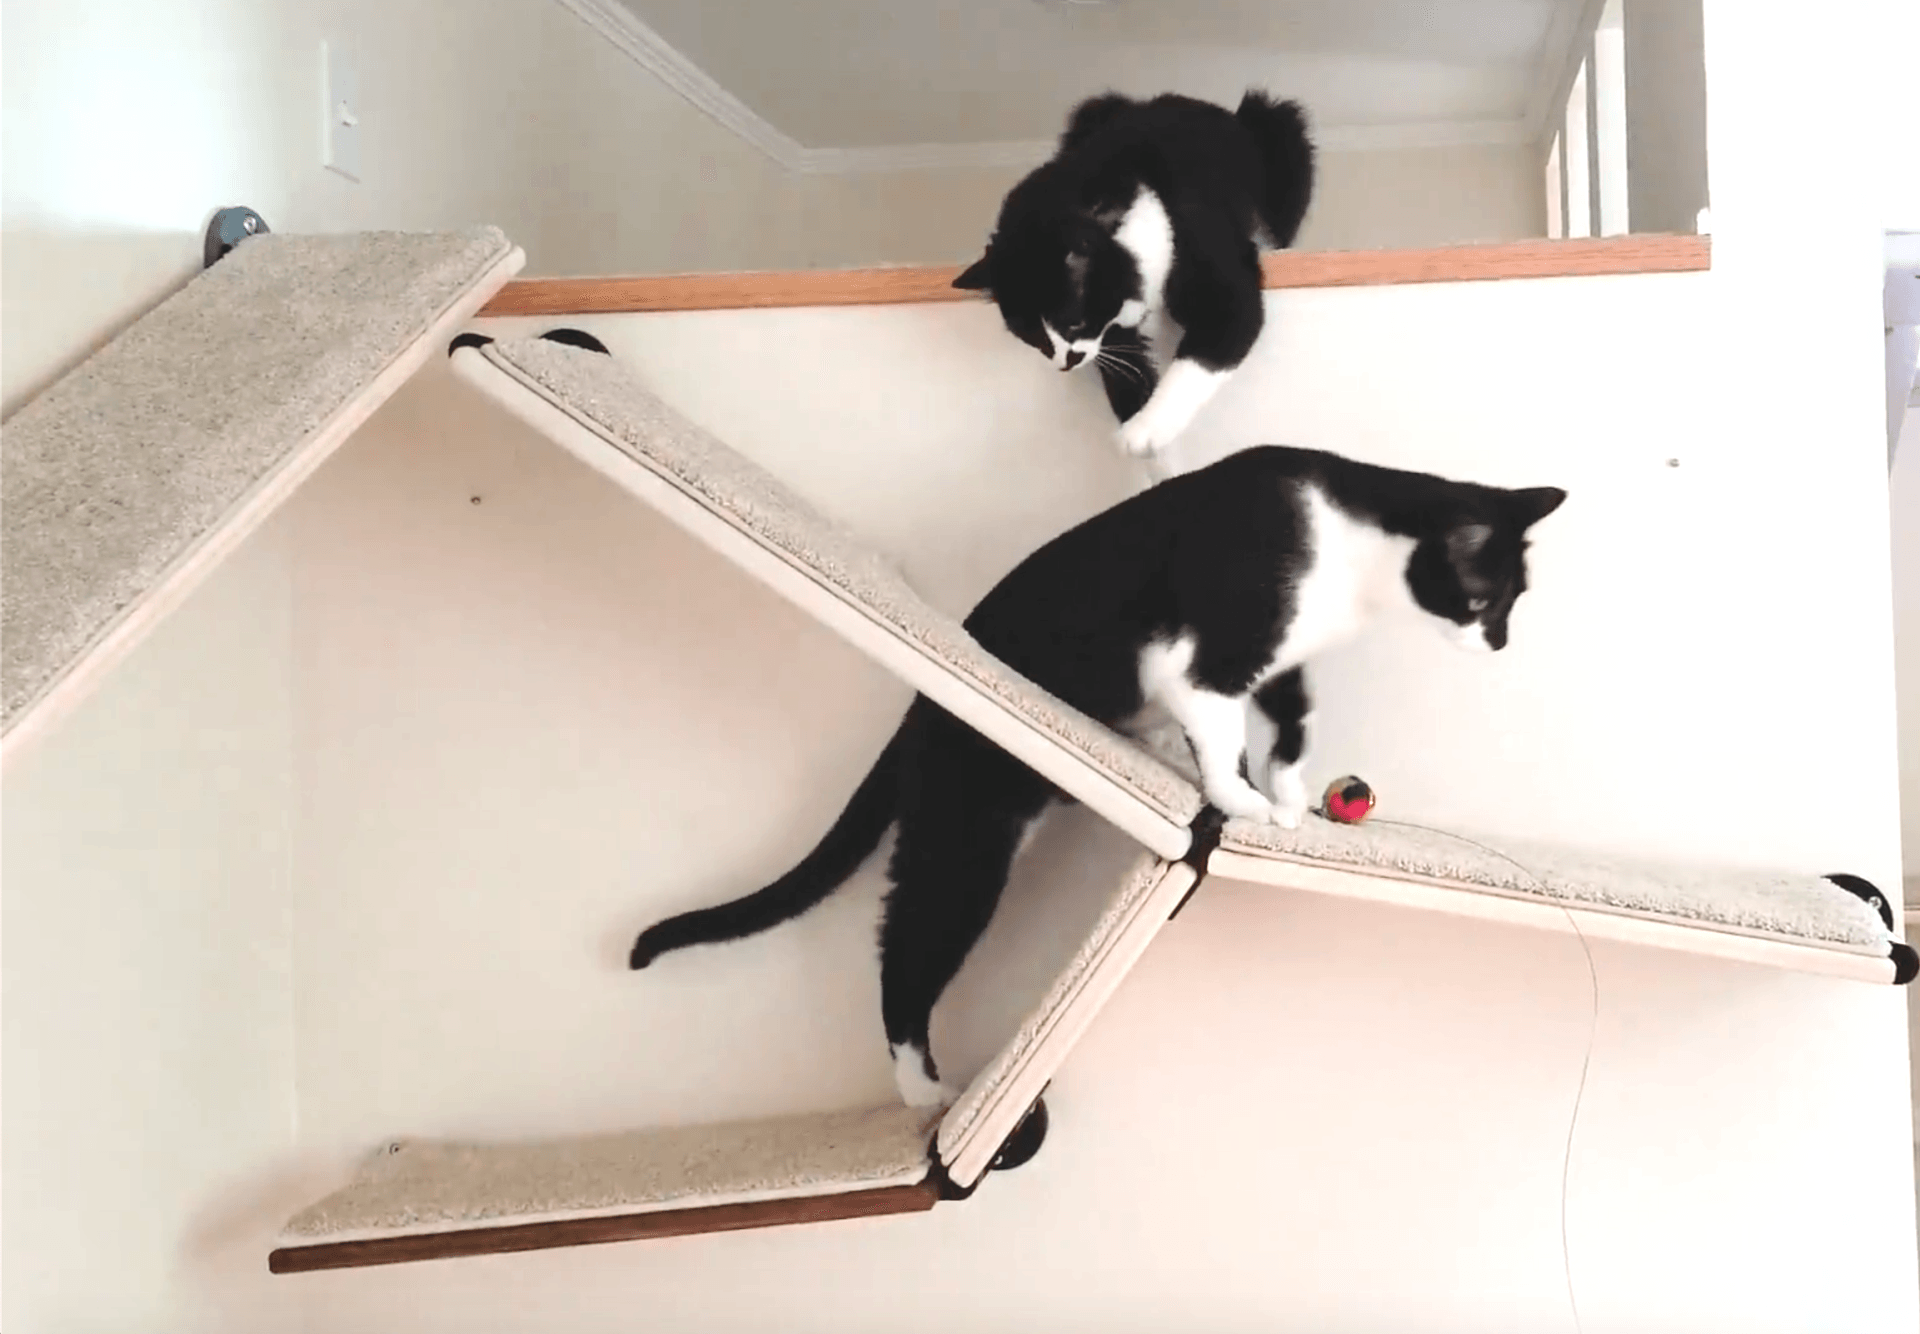
DIY Cat Shelves
There are many reasons to use CatScapes
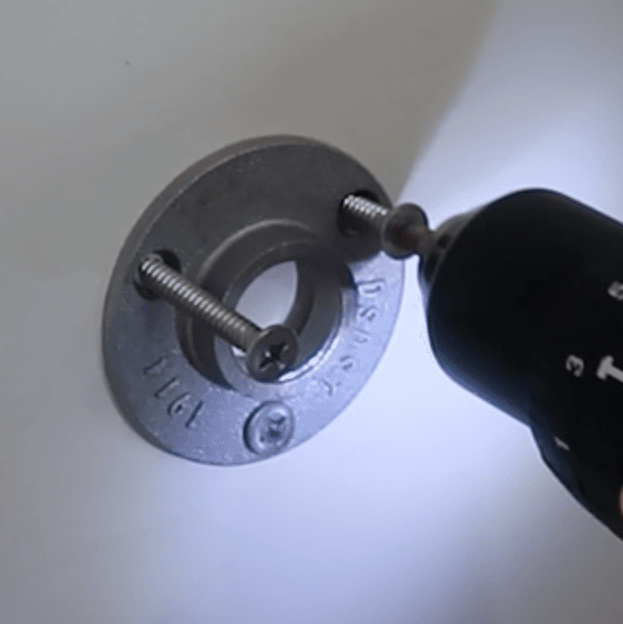
Hinge-Brackets
when making your own shelves to create a catscape
There are many reasons to use CatScapes
Hinge-Brackets when making your own shelves to create a catscape
- Form artistic configurations with ease.
- Total customization of quantity, lengths, and angles to suit your home and the abilities of your cats.
- Results in a clean and cohesive look.
- The varied angles emulate nature, allowing your cats to exercise muscles that otherwise atrophy indoors.
- Unprecedented structural stability in that the rigid spans positioned at angles and interconnected by the solid connections at the brackets double as gigantic L-brackets and distribute the load across all of the brackets in the configuration rather than just one or two!
Select the wood-type of your choice.
CatScapes uses clear pine because it is attractive, relatively easy to work with, light, and strong as well as economical.
Select 3/4" thick boards of desired depth/s.
CatScapes Cat Shelves are ~9 1/2" because that depth is sufficient for most cats to rest as well as run without the shelves protruding into the room too far. Once mounted, because of the thickness of the flange covers, the shelves actually come closer to 10" out from the wall. ~7 1/4" boards are sufficient for walking and ~11 1/4" boards are luxury for the cats! All of these are standard depths, and usually referred to as 8", 10", and 12". When using boards deeper than 9 3/4" it is advised that you position those brackets onto studs. Of course, you can use different depths for different segments of your catscape. For instance, you might use narrower boards for running areas and the deeper ones for "destinations", where the cats might lounge more. All of these shelf-depths will transition and fit into the same brackets just fine because the hole-placement is uniform.
Cut the boards to the desired lengths.
There are two approaches to doing this. One is to replicate the shelf-lengths that CatScapes manufactures. There are two reasons to do this: One is if you intend to replace your home-made shelves with CatScapes shelves once they are in stock and arrive, and two, the 16" and 32" shelves will usually land on studs when positioned horizontally, which is not vital but does lend additional structural support to the given configuration/s.
If replicating the CatScapes kits for the sake of replacing temporary shelves with CatScapes shelves, keep in mind the quantity of each shelf-length in the kits you are replicating. For instance, if you are awaiting the shelves for a Deluxe Kit, you would make 2 16" shelves, 1 20" shelf, 2 26" shelves with an opening for the cats to pass through, and 2 32" shelves. Note that because the brackets actually account for some of the shelf-lengths, the afore mentioned boards should be cut to 14 3/4", 18 3/4", 24 3/4", and 30 3/4" respectively. These will actually match the shelf-lengths manufactured by CatScapes so that you can slide the CatScapes shelves into your design without adjusting the placement and positioning of the brackets.
When using this first approach, follow the 20-step procedure shown on the Installation Page to install the shelves!
The second approach is to customize and potentially maximize the shelf-lengths between the brackets you have available to you. The maximum shelf-length is contingent on the wood-type, and keep in mind that the longer the shelf, the more it will flex when the cats are on it. Some cats are okay with flex, and it is actually easier on their joints, but other cats will only use the shelf if it is completely rigid when they jump and walk on it.
- We still recommend using painters tape to design your configuration. Then install the brackets according to your design. (See steps 1-4 on the Installation Page.)
- Measure the distance between the tubes of the brackets where the shelf will be placed.
- To account for the thickness of the U-clips, subtract 1/4" from the distance between the tubes. This is the length to which to cut your board.
Because you are not bound to the specific quantity and shelf-lengths of the CatScapes kits when using this second approach, the design and installation procedure is a little different:
Preparing the Board (Shelf) for use in CatScapes Hinge-Brackets
You will need:
- A pencil
- A ruler that measures in millimeters and one that measures in inches;
- Two clamps for holding the board in place when drilling;
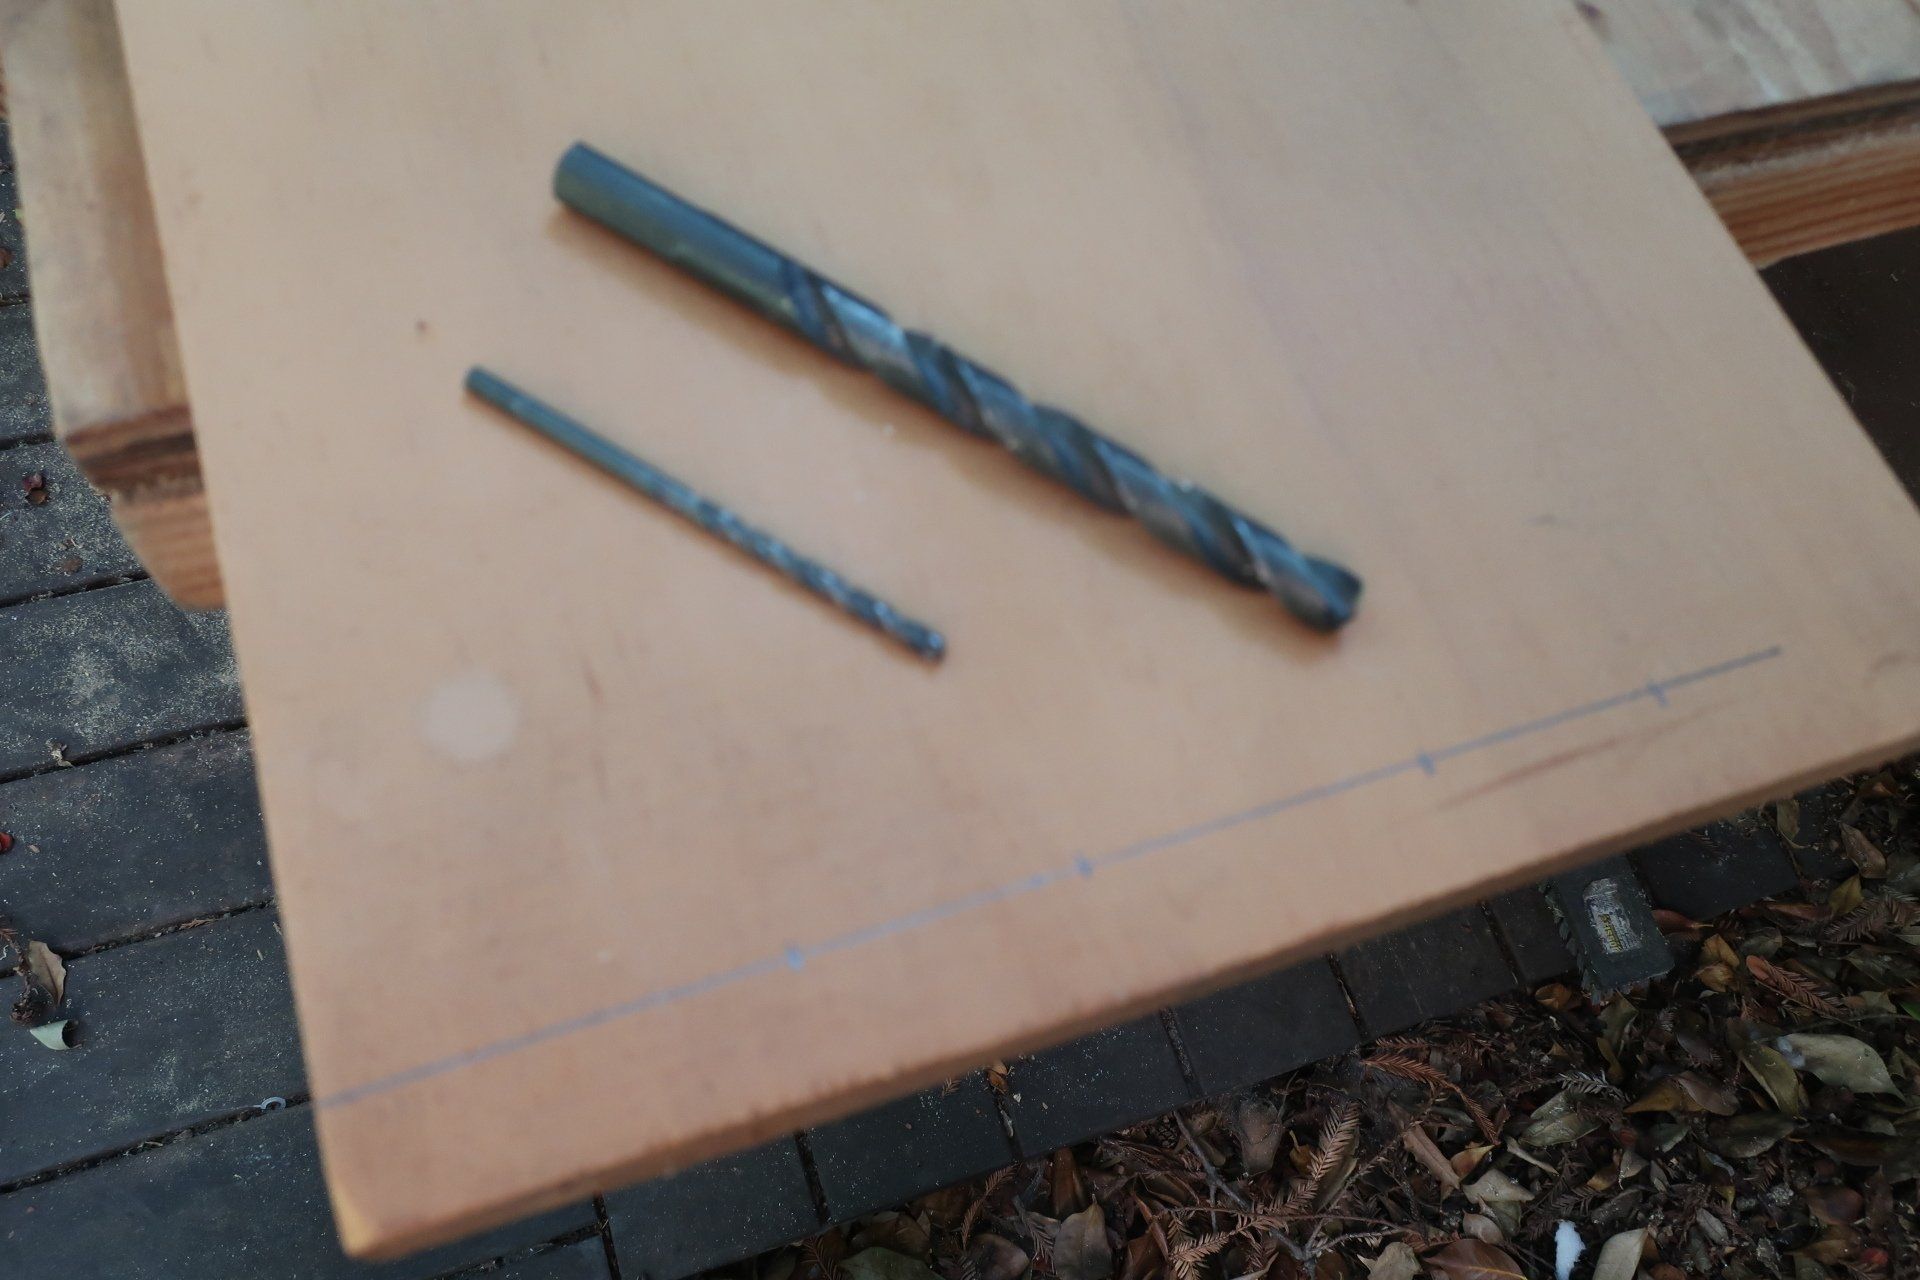
- A drill with a 1/8" bit for drilling pilot holes and a 3/8" bit for drilling the holes for the barrel bolts that fasten the bracket to the finished shelf;
- A sander for cleaning up and smoothing the holes you'll be making;
- A jigsaw for making openings/cutouts for the cats to pass through. This is optional and not necessary unless you are incorporating triple and quadruple brackets in your design.
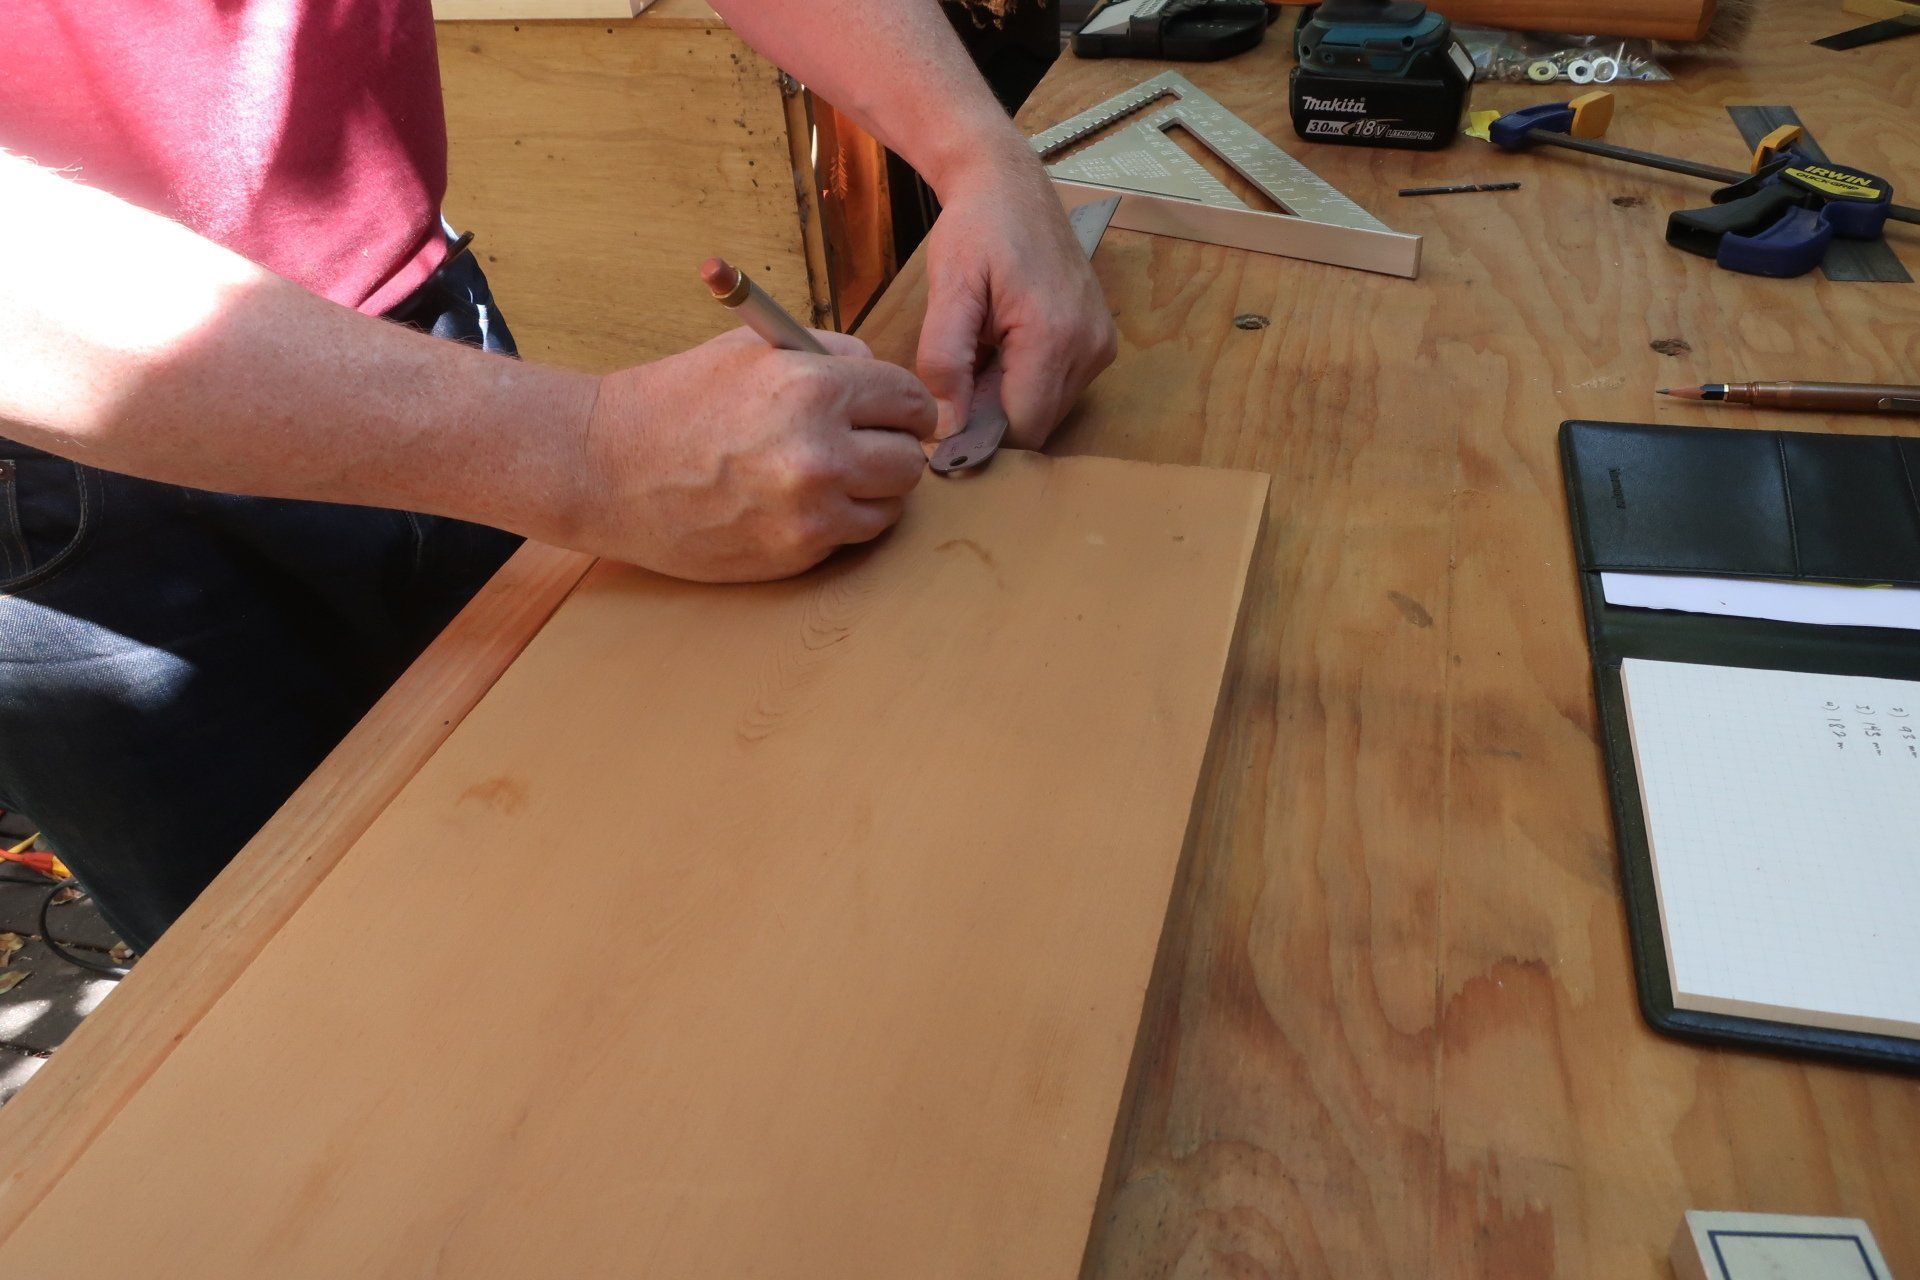
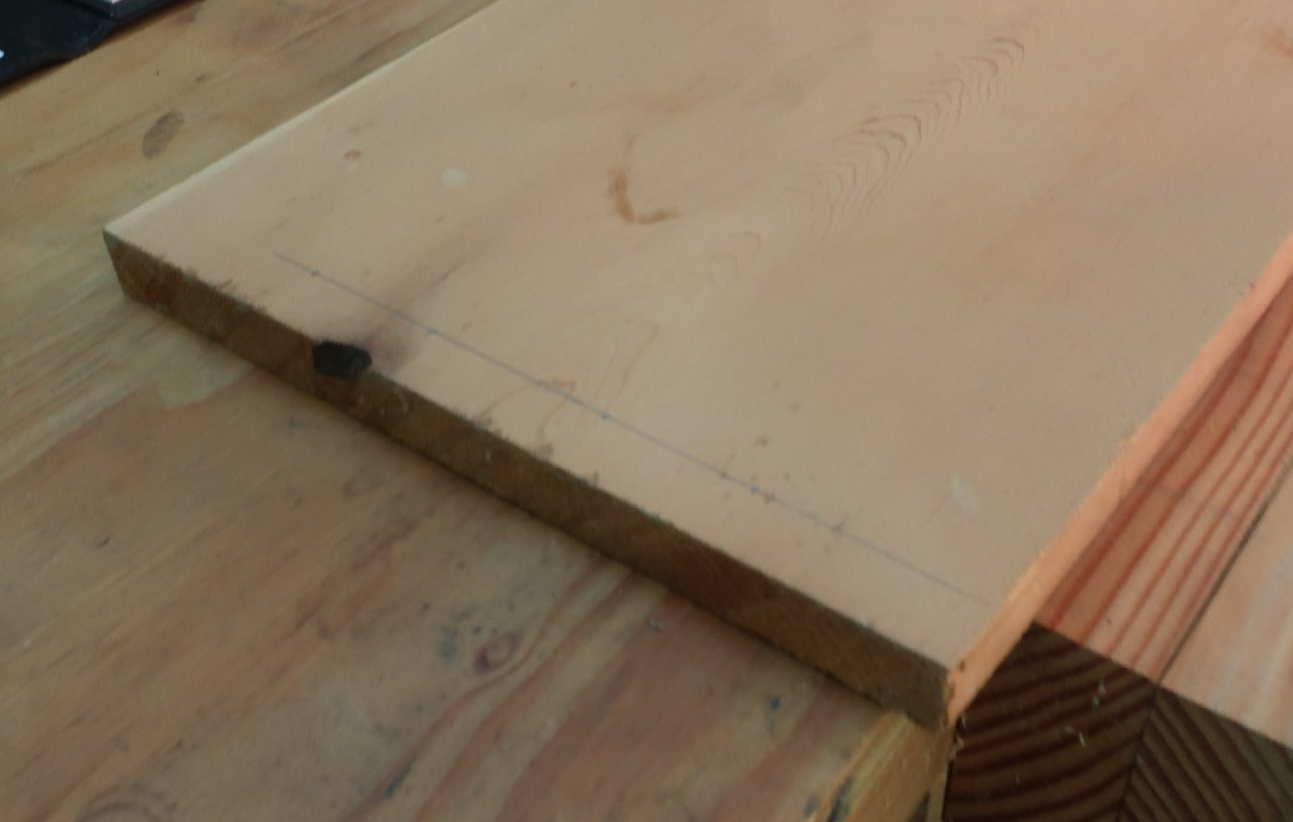
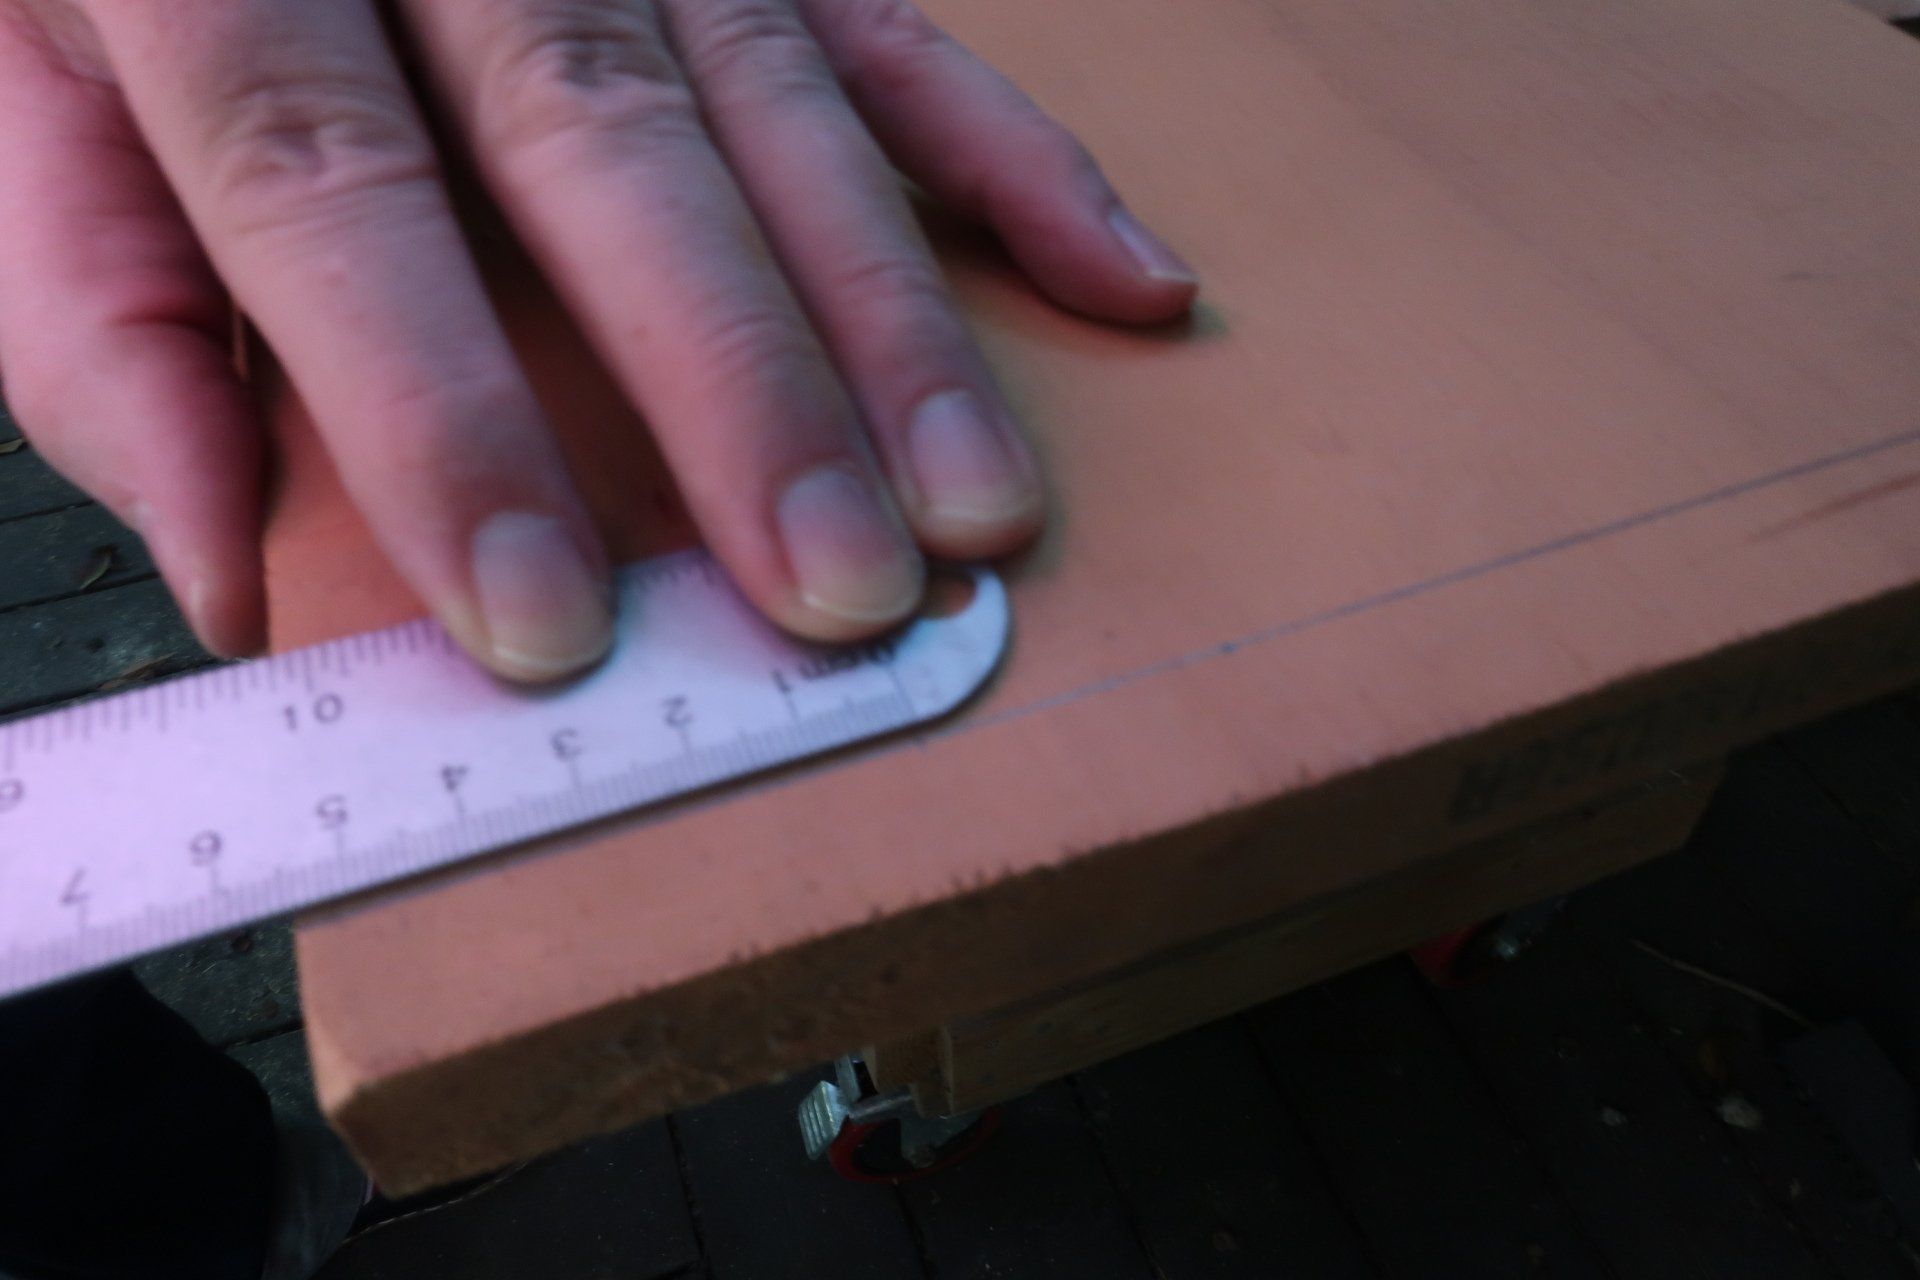
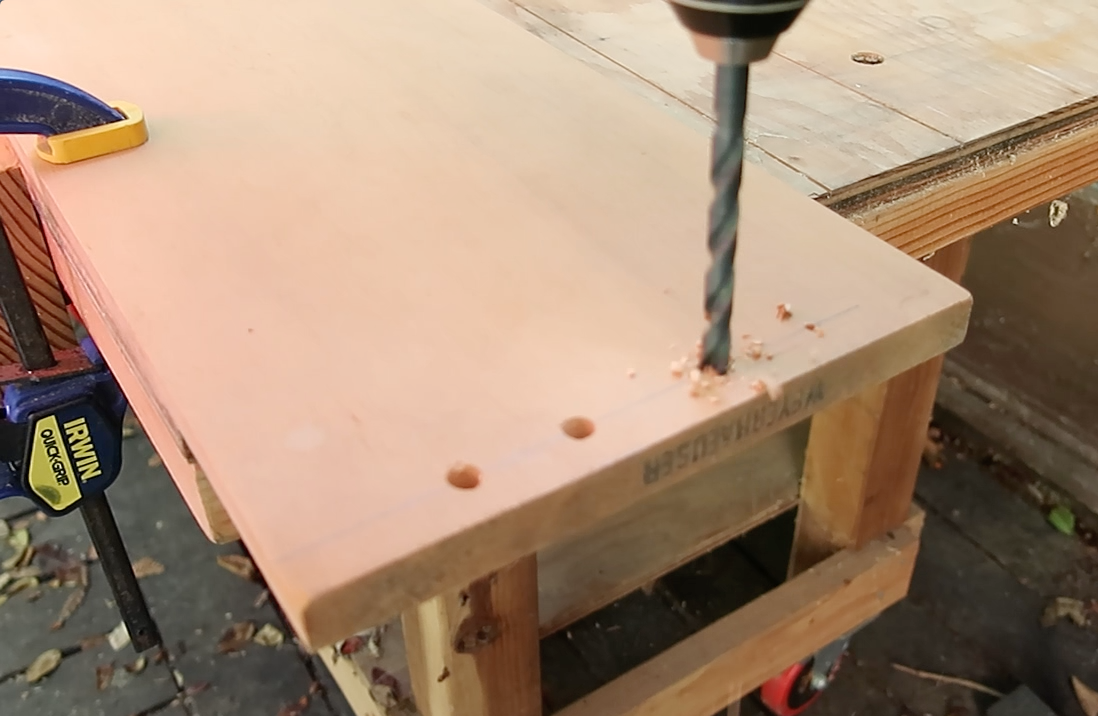
Measure and mark 17mm in from the edge of the shelf that will eventually connect to the bracket. Perform this step in two places so that you can draw a straight line.
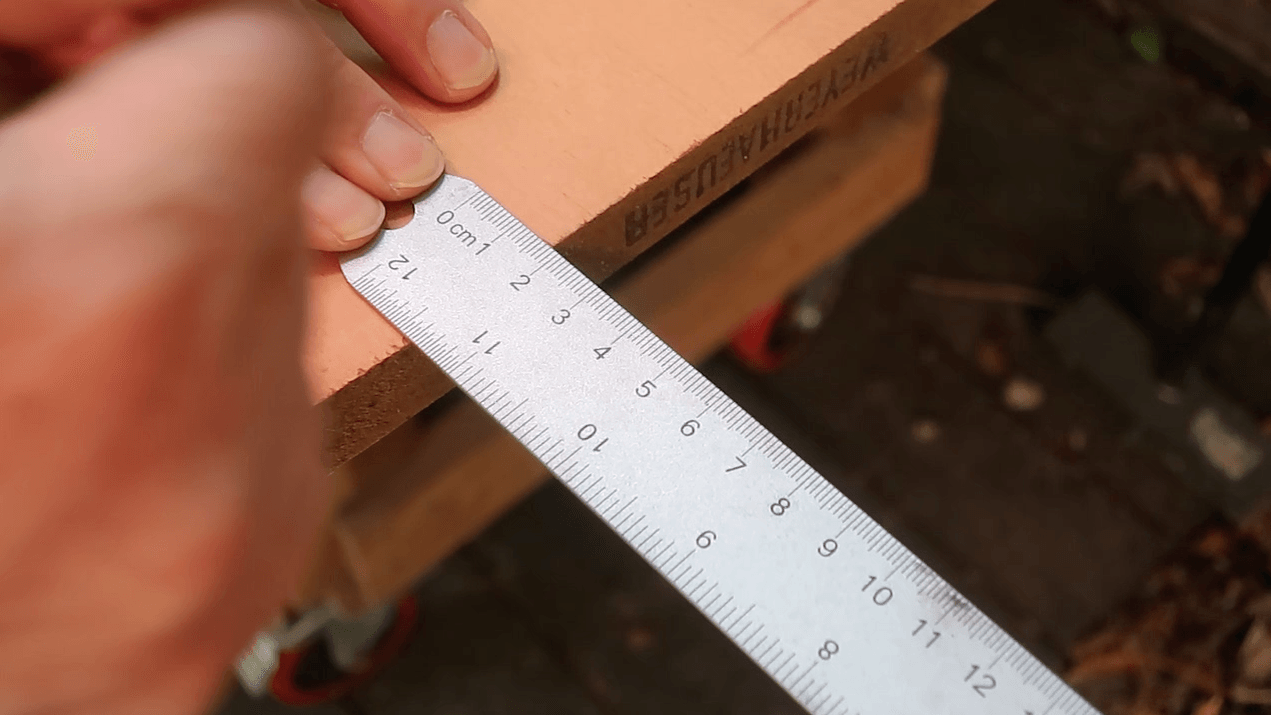
Measuring 54mm from the wall-side of the shelf, mark where the first hole will be made on the line that you just drew.
It is essential that you keep track of which edge of the shelf will be facing the wall so that the holes on both ends of the shelf align! Mark it with a piece of painters tape if that helps.
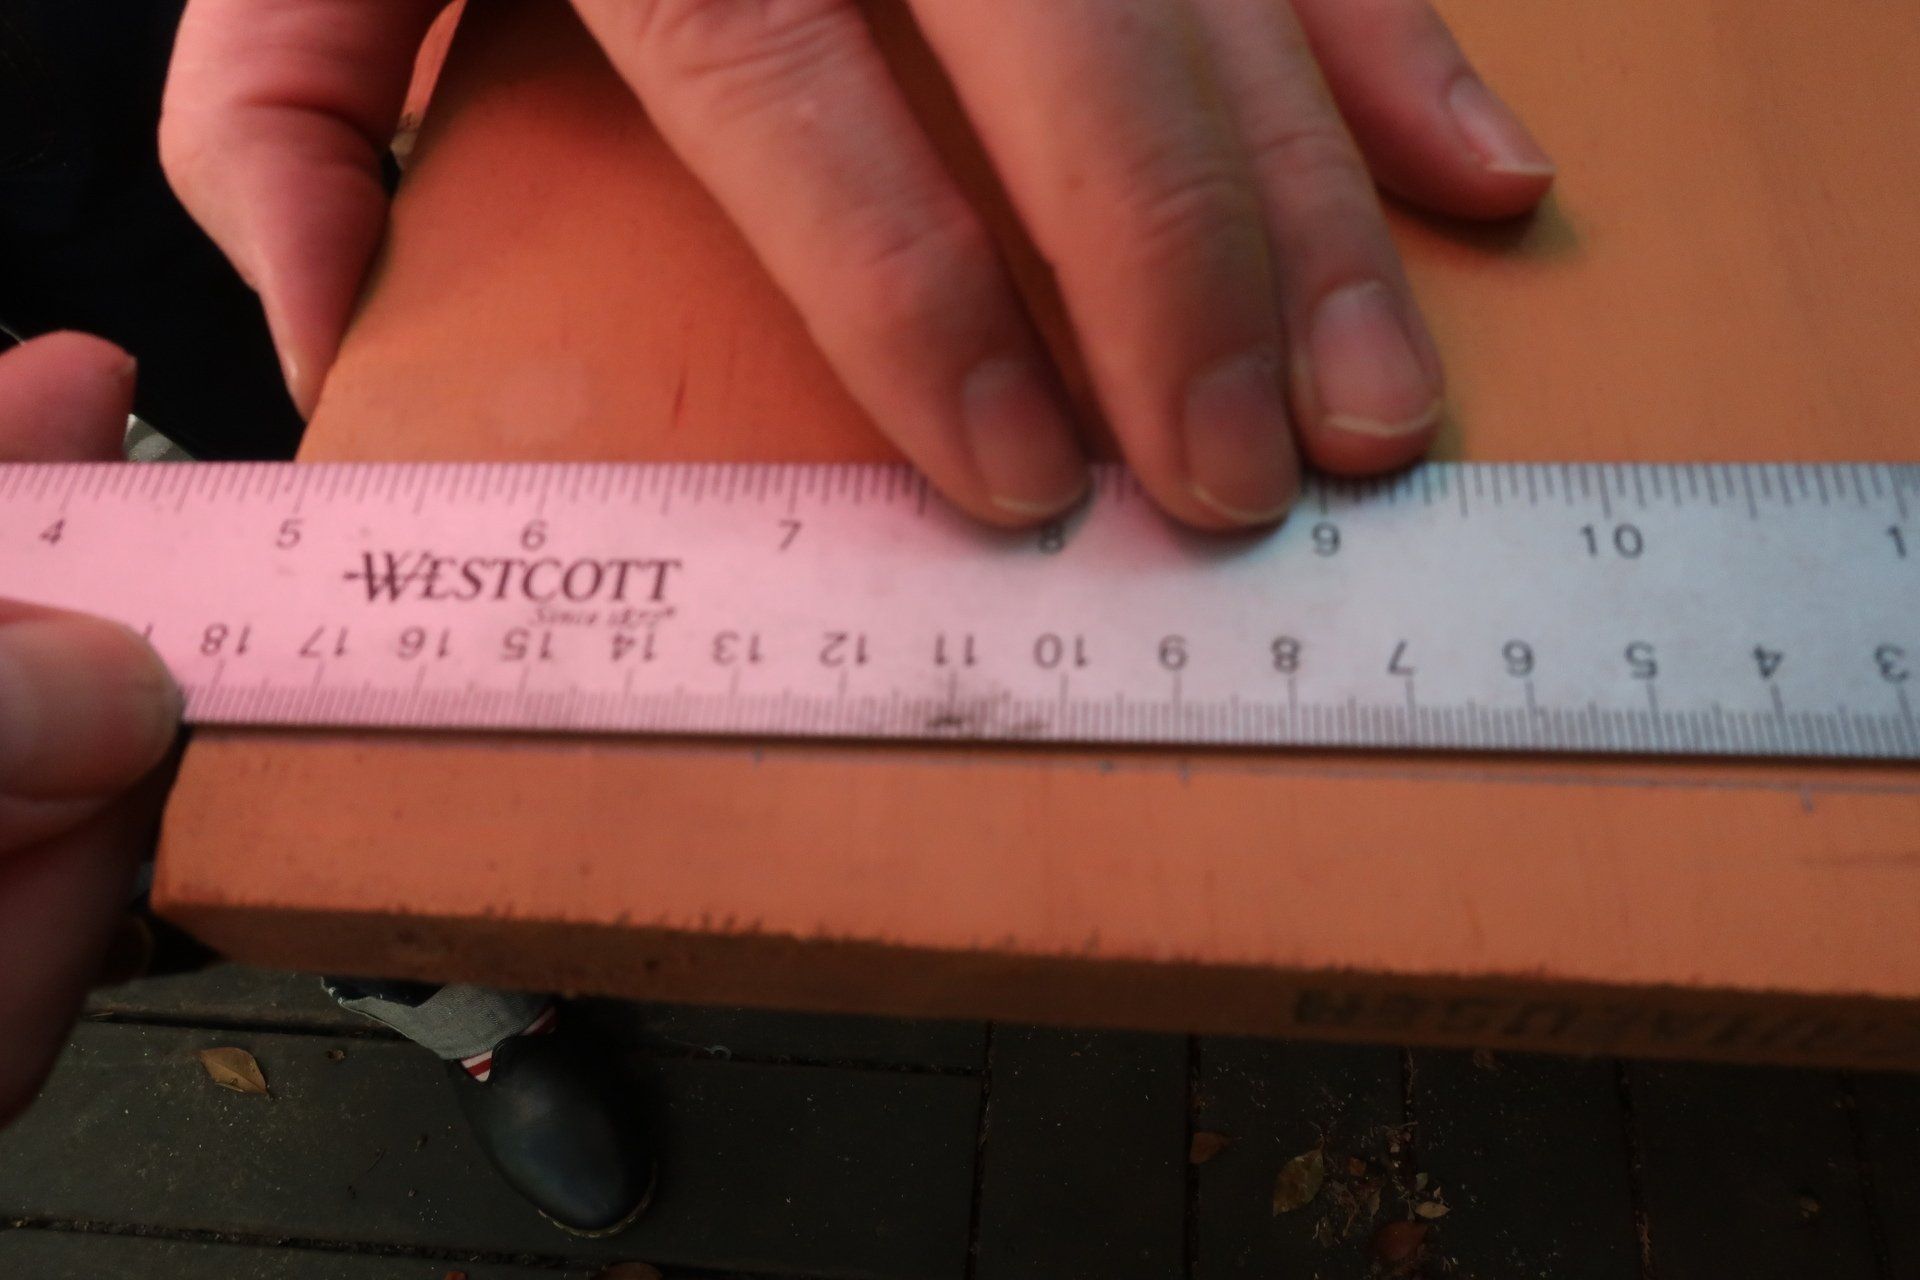
Measure and mark 93mm from from the wall-side of the shelf to indicate where the second hole will be made.

Measure and mark 143mm from from the wall-side of the shelf to indicate where the third hole will be made.
Ready to rumble ...
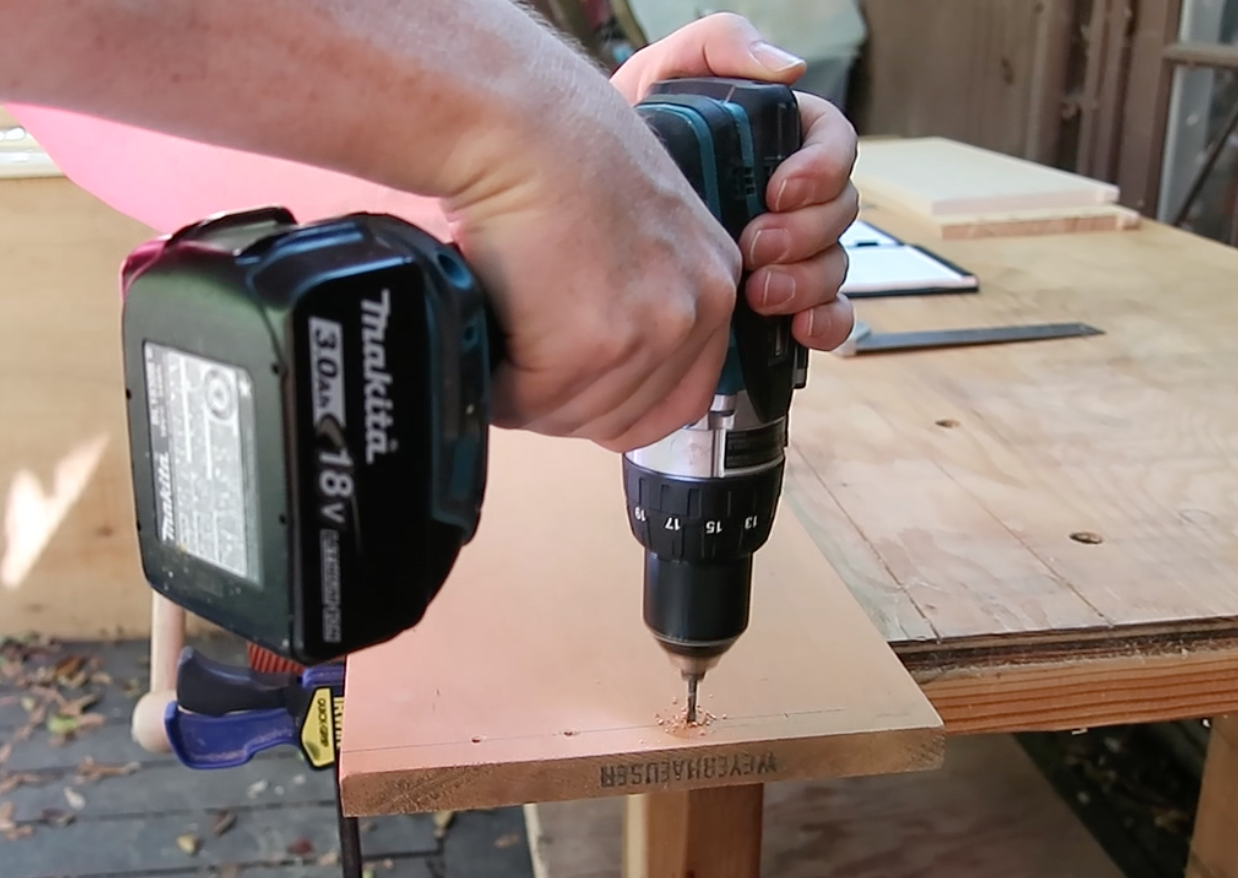
Clamp the shelf to the work table.

Use the 1/8" drill bit to make pilot holes.
Now drill the actual holes using a 3/8" drill bit.
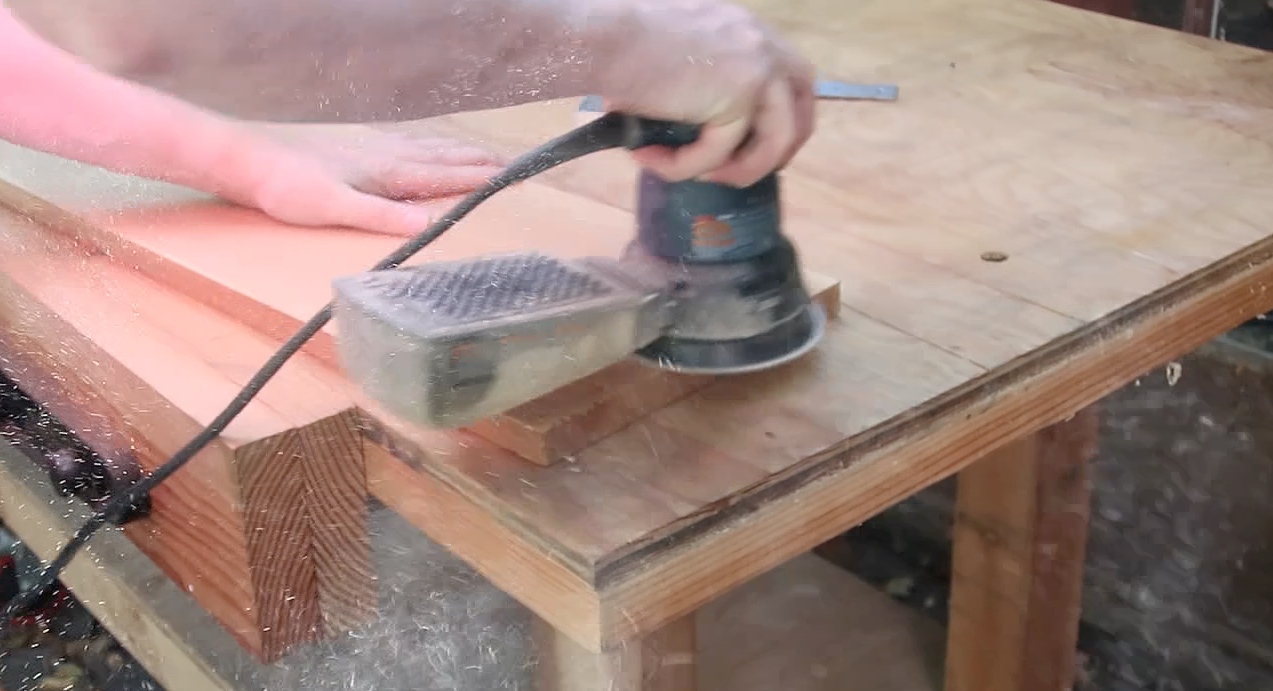
Sand both sides lightly to get rid of the pencil line and the debris.
Repeat the same procedure on the other end of the shelf, again, being sure that you are measuring from the wall-side of the shelf so that the holes align.
NEXT LEVEL - Making a Cutout
Repeat the same procedure on the other end of the shelf, again, being sure that you are measuring from the wall-side of the shelf so that the holes align.
The CatScapes cutout is 9" long and 6" wide (or deep) which is sufficient for most cats to pass through comfortably and also allows enough surface for the cats to walk past it if they choose.
The shelf is now ready to install, but you can further shape and finish the shelf however you want for aesthetic purposes.
Note that the barrel bolts are designed to fasten carpet pads onto the shelf, but if you plan on gluing the carpet to the shelf, the glue will adhere better to the surface when you leave that side unvarnished/unstained/unpainted.
Carpet
Especially because the CatScapes bracketing system is designed to facilitate shelves positioned at angles, it is important to attach a carpet layer to the shelves. Use cut loop ("shag") carpet to prevent the cats' nails from being snagged.
The carpet can be attached using hot glue but will be more difficult to remove and replace. CatScapes Cat Shelves use the same barrel bolts that fasten the U-clips of the brackets to fasten the carpet to the surface of the shelf! This provides a very strong, mechanical connection that allows the carpet to be removed and reinstalled as often as one wants using the two Allen keys that come with the brackets. This is shown in steps 17-20 on the Installation Page.
PROCEDURE:
- Use the shelf itself as a template for marking the carpet backing, being sure to mark the location of the holes.
- Cut the carpet piece to the indicated dimensions.
- From a Grommet Kit, use hammer on a 3/8"-1/4" mandrel against a hardwood backer block to puncture the holes.
The carpet is now ready for installation, and for a more finished look, you can bind the carpet.